
What Is Roof Underlayment & How to Install It – All Your Queries Answered
As homeowners, we all want our roofs to last as long as possible. This means we need to understand how a typical roof functions, so we could give it proper maintenance.
So what exactly is there under the roof?
From the outside, you can only see the tiles or the shingles on the top surface of a roof. However, your average roof has multiple layers that allow it to do your bidding.
An important roof layer you might be unaware of is the roof underlayment. This critical mid-layer of your roof helps to provide support and block moisture.
News flash: a damaged underlayment is not good news for your roof’s health.
The fact that many homeowners are not aware that roof underlayment exists at all makes them disregard its importance. Without the right knowledge, tasks like installing or repairing the underlayment are bound to get more complicated.
What is Roof Underlayment and Why Do You Need It?
Let’s start from the inside. What’s the uppermost section of your home visible from indoors?
Easy answer: the ceiling.
Above the ceiling, there are rafters. These are structural elements made of timber that create the framework of the roof. They form the skeleton structure connecting with the exterior walls to transfer the roof’s load. Now, some roofs may use a truss system that can bear more weight. But that is a subject for another day.
Above the rafters lives the first layer called roof decking. Generally made from plywood or oriented strand board (OSB), the decking creates a uniform surface and prevents the roof from sagging or buckling by bearing the weight.
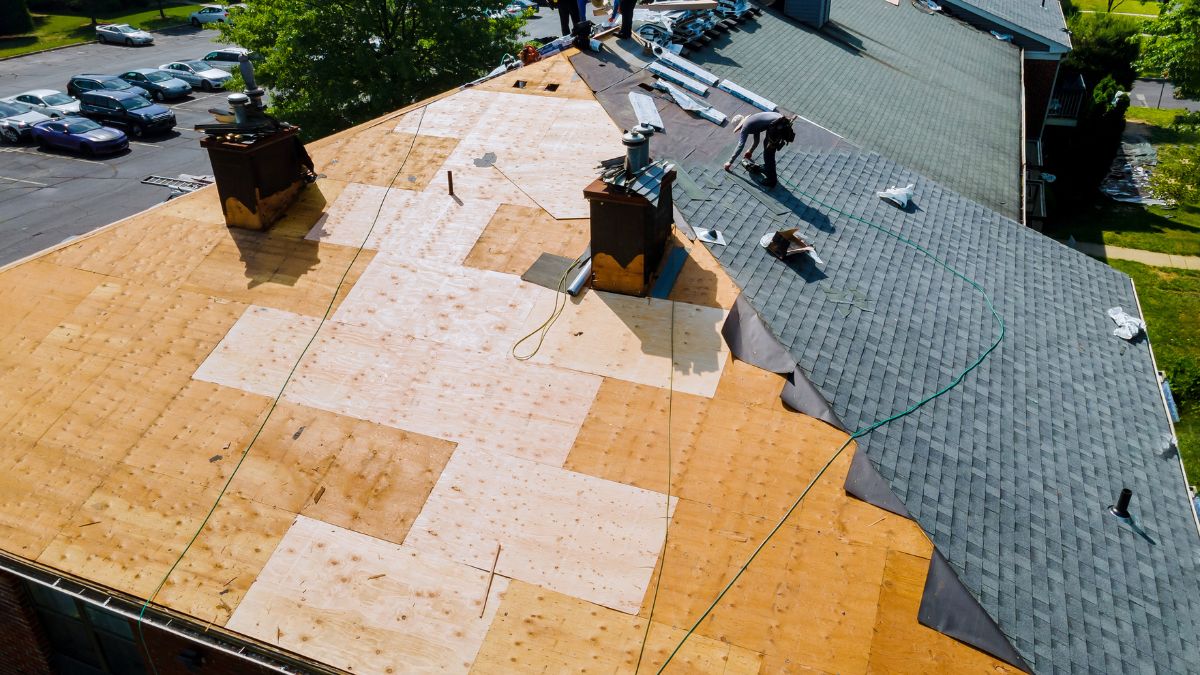
On top of that lies our hero of the day: the underlayment. This additional layer forms a second line of defense above the decking to prevent ingress of water. Think of it as a protective blanket that connects the decking with the top roof layer.
Here is a common question: is roofing underlayment necessary? After all, it is expensive, and the installation is not so simple.
The answer is a point-blank yes. If there’s a crack in the top roof layer, the underlayment will protect the decking from water damage. And keeping the roof dry will prevent the growth of mould and mildew. Quite simply, if the underlayment is damaged, the main structure of your roof becomes vulnerable to the impacts of weather.
If you are wondering whether a metal roof needs underlayment, the answer again is yes. And I will give you another reason for that.
The right underlayment also offers interior insulation.
Suppose you have a metal roof. There will be some heat transmitted inwards on a hot summer day. The right underlayer can reduce this from happening. Likewise, it will keep your home relatively warm in winter. In other words, it makes your home more energy efficient.
3 Common Types of Roof Underlayment
When it comes to the choice of roof underlayment, you have three main options.
But before going into that, let’s address an important recommendation from the Building Code of Australia. It has to do with roof sarking, which is often mistaken for underlayment.
Now, some may consider sarking to be a type of underlayment, but technically, it is not exactly so. Sarking is a metal sheet that acts as a layer of reflective thermal insulation and helps with interior condensation management.
With its reflective properties, sarking helps to keep your home cool by reducing heat flow through the roof, ensuring better thermal performance. It also acts as a barrier against moisture, especially in areas with high humidity. Moreover, it has ember-resistant properties – which is great for bushfire prone zones.
Even though sarking works great as a protective layer in some areas, a typical roof underlayment can be a better choice for some homes.
Back to the main roof underlayment types.
1. Asphalt-Saturated Felt Underlayment
This form of underlayment used to be extremely popular before the rise of synthetic underlayment. The material is made by mixing natural and synthetic plant fibres with asphalt. Asphalt forms the base layer to make it water resistant.
Asphalt-saturated felt comes in multiple thickness options and the thicker the material, the more durability it offers. It forms an economical seepage barrier, and being flexible, installing it on roofs with complex shapes is possible. Then again, felt is a breathable material. This allows any moisture trapped under the underlayment to escape.
There are a couple of downsides, though.
The problem with asphalt-saturated felt is its tendency to degrade under extreme temperature conditions. It’s not uncommon to find the asphalt wrinkling and cracking when exposed to very cold conditions for long periods.
Plus, the thicker versions are on the heavier side. So, handling the material while installing is difficult. Also, it’s water-resistant but not watertight. In areas with heavy rainfall, the material can absorb water.
2. Synthetic Underlayment
The rise in popularity of synthetic underlayment happened for multiple reasons.
First, the material has high durability and excellent tear resistance due to its polymer structure. Besides, it is lightweight and can resist extreme weather conditions without breaking down.
The material is also specially treated to offer UV-resistance. While it is not completely waterproof, the synthetic underlayment is highly moisture resistant and sheds water very well. Being flexible as well as lightweight, it is easier to install.
Not that it comes without any cons.
Firstly, synthetic underlayment is more expensive than asphalt-saturated felt. The lack of breathability is another issue. In case any moisture is trapped under the material, it can’t escape. That may lead to the growth of mould or mildew.
3. Rubberised Asphalt Underlayment
This is a combination of rubber polymers with asphalt, making it a more weather-resistant option than asphalt-saturated felt. If waterproofing the roof is your priority, rubberised asphalt is the best option. Durability is great and the material is highly resistant to tears.
Some options come with a self-adhesive backing that allows it to be stuck directly on the decking material, creating an airtight bond. The material is flexible and great for adhering to complex roof shapes.
However, the sticky adhesive requires careful installation to prevent any wrinkling.
While it is a great long-term roofing solution, rubberised asphalt is going to strain your pockets. You can go for it if you don’t mind the high upfront investment.
How to Install Roof Underlayment: Main Steps
As you have seen, the installation of roof underlayment depends on the type of material you pick. And for that, the exact requirements can vary from home to home.
Does your location have relatively consistent temperatures throughout the year and less rainfall? Then asphalt-saturated roof underlayment is a great option.
Suppose the roof has to tolerate high temperature variations round the year. Then rubberised asphalt is a better choice. On the other hand, if you need good durability and have a metal roof, synthetic underlayment can be the best option for you.
Beyond that, cost is an important factor. Asphalt-saturated underlayment is the least expensive while rubberised asphalt is the costliest. Synthetic underlayment falls in the middle.
Whichever the type, though, it would be wise to remember one thing: the underlayment should not remain exposed for long periods. It is best to cover it with an outer layer as soon as possible.
Will the exposed underlayment get damaged within a month or two? Probably not. But think about it. Investing money into a quality material is not worth it if you are reducing its lifespan by leaving it exposed to the elements for months. Check the manufacturer’s specification to determine the maximum exposure time for the material.
From that aspect, asphalt-saturated felt underlayment is most vulnerable to the elements. The other materials are more weather resistant and can withstand the action of water and solar UV rays for some months.
Here are the important steps for installing the roof underlayment, along with a few installation tips. Not to forget, follow the local codes before installing any form of roof underlayment.
Prepare the Roof Deck
Make sure that the roof deck is free from any damage, and keep it dry.
Check for any sign of rot; if any, address the issue immediately. Clean the deck to remove all dirt and debris and seal any gaps between the deck panels. If there is an old layer of underlayment that you are replacing, get rid of every last bit of it.
Measure and Cut the Material
Plan the installation sequences and measure the underlayment to cut it into manageable sections. This is essential for easy handling of the material. Remember, the subsequent rows should overlap by 12-15 cm to ensure waterproofing.
So, the measurement needs to be done accurately to reduce material wastage.
Lay the Material
Start from the bottom of the roof and lay the first row horizontally. Keeping an overhang of a few inches is a good idea as it will help in redirecting the water. It is important that you align the first row properly as the next rows will follow its orientation.
Use nails to fix the material to the roof, placing them around 30 cm apart. For synthetic underlayment, cap nails are the best option as they will reduce chances of material damage. Keep the seams staggered to minimize leaks.
Securing the edges and seams is critical as the material is more likely to lift from these areas. If needed, flashing can be used to reinforce these vulnerable areas. Give the finished surface a final check to ensure that there are no unadhered portions or wrinkles.
Roof Underlayment: FAQs
What is the best underlayment for roofing?
The choice of the best underlayment depends on your home’s exact requirements and your budget. If you are seeking the best durability and waterproofing, a rubberized asphalt underlayment is the best option. On the other hand, asphalt-saturated felt is the most economical option.
Does a roof need underlay?
Yes, every roof, even a metal roof, needs a layer of underlayment for better protection against moisture. Whatever the type of roof, if needs underlay to protect and insulate both the home interior and the roof construction itself.
Can you put underlayment on a wet roof?
No, you can’t and shouldn’t put underlayment on a wet roof. Moisture trapped under the underlayment can lead to the growth of mould and mildew, ultimately damaging the deck material.
How long does roof underlayment last?
The life of a roof underlayment depends on multiple factors, like the type used, the environment it is exposed to, and the quality of the installation. Maintenance is important, and you need to read the warning signs that the roof needs a repair. Synthetic or rubberised asphalt underlayments can last between 20 to 30 years. Asphalt felt can last for 20 years when well maintained.


